Lesson Title:
African
Textile Design: Finger Spinning and Weaving
Author: Lucy Andrus
Grade/Age Level: Can be adapted for grades K-9
Written here for: Third grade Inclusion Class
Conceptual Basis For This Lesson:
Unit/Theme, Relation of Lesson to the Unit, Major Concepts to be Learned:
Relation to Life:
Learning
Standards
Goals Specific
to Lesson/Unit (reflecting NYS standards, & targeted learning areas. See
Abbreviation Key at end):
- Develop greater appreciation for cultural diversity in lifestyle and aesthetic systems; and for similarity (e.g., all makers of art use art elements and principles) (Std. 4, AH, AC, AE, S)
- Increase understanding and appreciation for artisans and artistry of African textile design and production (Std. 3 & 4, AC, AE)
- Develop skill in the art of weaving (Std. 2, AP)
- Improve cognitive skills: abstract thinking (symbol), and planning, follow through, problem solving, and memory recall (Std. 3, AC, AE, A/C)
- Improve perceptual/motor skills:
directionality, fine motor, visual tracking
(Std. 2, AP, P/M) - Develop personal aesthetic sensibilities (Std. 1, AE, E)
- Improve attending and participation
skills (Std. 1, AP, W/S, S)
Performance Objectives for Observational Assessment (reflecting goals):
The students will be able to:
Opening:
- Name at least two features a culture encompasses
- Describe at least one thing learned about African culture
- Define the term textile
- Name one example of African textile design (Adinkra, kente, mud cloth, adire eleko)
- Attend to slide presentation without disruption
- Name/indicate the warp and weft threads on a weaving loom
- Finger spin at least five inches of thread from a cotton boll
- Define the term symbol
Middle:
- Name/describe at least one personal quality to represent in weaving, and select at least one color to symbolize this quality (e.g., I will use red to symbolize my strength)
- Using the plastic needle
and pre-warped loom, create a weaving that:
a. is at least 4 inches long
b. uses at least two different colors, with at least one being the personal
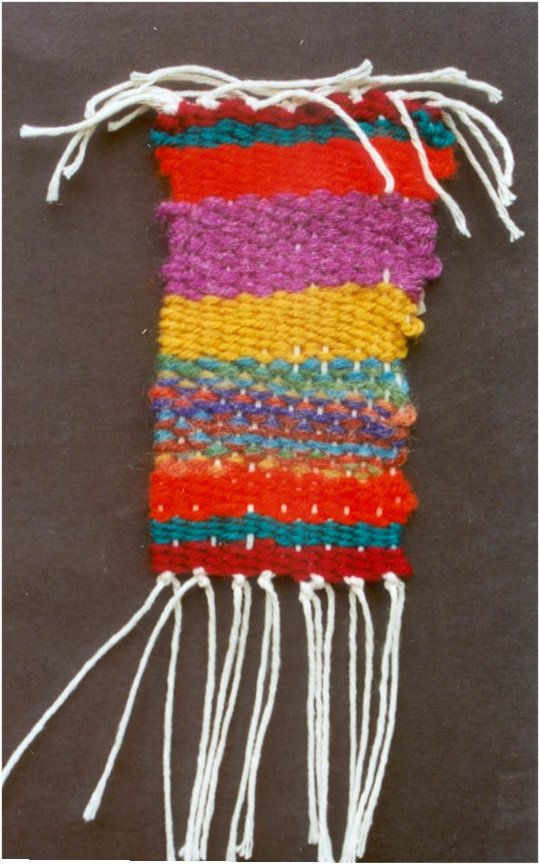
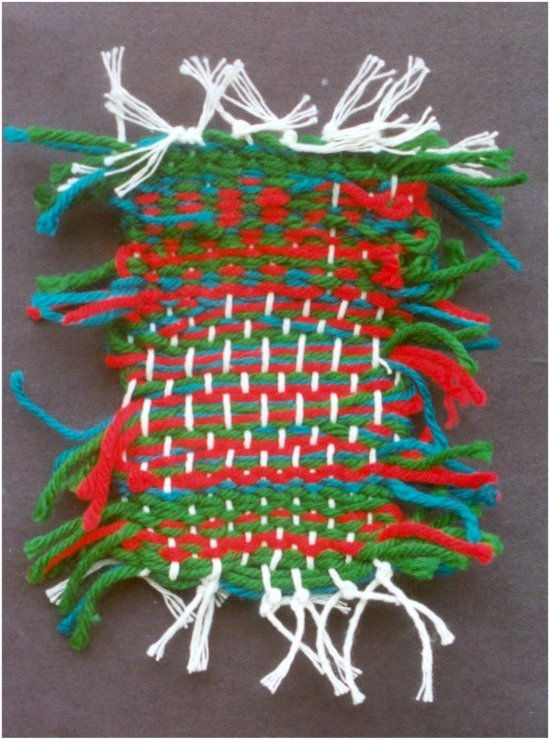
symbol color - Cut and tie fringe on completed weaving with S/Ts’ help
Closing:
- Recall at least one example of African textile design/method
- Describe how larger pieces of cloth for clothing are made in West African culture (individual strips created are sewn together to create a larger piece of fabric)
- Describe at least one thing about African culture that s/he admires
Tools Needed For Application
Vocabulary (defined in age-appropriate, student-friendly language):
- Ancestors: a family relative who lived before you; the people from whom you came, descended from
- Culture: a way of life; the way certain people live; the customs, habits and traditions of a group of people
- Loom: what we weave on
- Symbol: something that stands for an idea, like a heart shape for love, or the color red to mean stop, or the golden arches for McDonalds
- Textile: fabric, cloth, material clothes can be made from
- Warp: the bottom/vertical strings of a loom that go on the loom first
- Weft: the horizontal threads we weave through the warp strings
Visual Aids:
- Teacher-made:
various weaving examples, a cotton boll with a pre-spun length of thread,
African triangle loom (if possible), culture chart, map of Africa, warp
and weft chart, list of personal qualities chart or handout (see #21 under
Procedural Steps)
- Art Resources:
slides presenting an overview of African culture, ending with a focus on
dress; slides from book, Master Weaver of Ghana by Louise Meyer
(see www.africancraft.com); selection of African artifacts (textiles including
example of kente, Adinkra, adire eleko and mud cloth); CD’s of African
music.
Kente: cloth that is woven with symbolic colors and shapes
Adinkra: cloth that is printed with Adinkra symbols,
Adire Eleko: a cloth design created using a cassava paste resist process
Mud Cloth: cloth printed with design using a mud paste resist
Materials and Preparation:
- boom box and CD of African music
- globe
- slide projector, screen, extension cord
- piece of carded wool
- cotton boll for each (order from www.cottonman.com)
- cardboard looms for each (can be bought or made from corrugated cardboard)
- cotton thread for warp; warp each loom beforehand, app. 4” wide
- colored yarns for weft
- plastic needle with large eye
- hair pic or comb for each to beat back each woven line
- scissors
- masking tape & black markers for labeling names
- larger loom with wider warp and weft material for demonstration
Application
Procedural Steps: (details on procedures from beginning to end with ability-appropriate language scripted in as necessary):
NOTE: This lesson will take place over two sessions.
Opening:
1. African music should be playing in background during set up.
2. Lead teacher opens with introduction to new unit, explaining that the world is such an interesting place with so many different countries and people and cultures. Teacher uses globe to help students see how many other countries there are in the world, and asks them if they can name any other countries that they know of.
3. Teacher points out that for most Americans, our ancestors came to the USA from someplace else in the world. Teacher defines term, ancestors, and asks where the students ancestors came from. Does anyone have a relative who came here to the USA from another country?
4. Teacher focuses on continent of Africa: Does anyone recognize the music we heard before? What place in the world do you think it might be from? Teacher shows students Africa on the globe and the maps, focusing on the West Coast area of Ghana and Cote d’Ivoire, suggesting that we can learn something about the people and culture of this area of the world, where many of your ancestors came from.
5. Teacher helps students define the term, culture, using culture chart: Culture is the way that people live, their habits, their customs, their traditions. Can anyone name something that is a part of our culture in the USA? (use the chart which lists: food, clothing, music, art, language, religion, beliefs, holidays, etc.)
6. Teacher suggests we begin to learn something about African culture by taking a look at some slides that will show us about the different countries, areas, people, and lifestyles on this amazing continent (only a small segment is shown today, to be continued throughout the series). Teacher ends this part of slides with a focus on different ways that African people dress and why.
7. Following the slides, the teachers help students to discuss: Where do we get our clothes? Does everyone buy clothes in a store? Do some people make their own clothes? If so, where do we get cloth or fabric from to make clothes? Who decorates the fabric? How is an artmaker involved?
8. Teacher explains that today, we will learn about some of the ways that the Akan people of West Africa make cloth to sew into clothes for themselves, and to sell to others in the market place. Teacher explains that the business of making and decorating fabric is called the textile business, and defines the term, textile.
9. Teacher discusses and shows different examples of African textiles, explaining each piece and how it is designed and produced: Adinkra, adire eleko, mud cloth, and finishing with kente cloth. Teacher explains use of indigenous materials, making art and design materials and tools from nature, the use of cultural symbols (recall term) in the choice of color and pattern of the cloths, some meanings of the symbols that have been passed down for generations, who can wear the cloth and when/why, the idea of talking cloth (oral history and tradition), etc.
10. Teacher focuses on kente cloth and how it is made? Teacher explains the art and craft of weaving to make cloth, and how strips of cloth are woven and then sewed together to make a larger piece of cloth that can then be made into a garment to wear.
11. Teacher then shows selected slides from the book, Master Weaver of Ghana (optional, depending on time allocation and students’ attention spans).
Middle:
12. Following slides, the teacher
explains that to weave cloth, you must start with thread, and asks students:
where do we get thread?
Teacher explains that natural threads all come from nature either in the form
of a plant or animal fur, showing sheep’s wool, and then the cotton.
13. Teacher presents cotton, from seed to plant to cotton boll, explaining how cotton is grown in these parts of Africa we are studying because of the climate. Where else is cotton grown? In the southern USA for many generations. All students are given a cotton boll to gently handle.
14. Teacher asks students how they think we can get thread from a cotton boll? What do we have to do with this fluff of cotton? We have to spin it! What if we don't have a spinning wheel? How can we do this? Teacher begins to demonstrate finger spinning.
15. Each student can begin to finger spin from their cotton boll, working around the seeds: hold boll in one hand, using pinkie and ring finger to hold stem, and middle, index and thumb to gently hold the fluff, as index and thumb of opposite hand begin to gently pull out a bit of fluff and start to spin it clockwise by twisting in one direction only while gently continuing to pull out. Continue pulling and spinning gently, twisting in the same direction. Students should try to finger spin at least three inches without breaking thread. If thread breaks, twist back into itself.
16. Following finger spinning, the teacher proceeds to explain weaving, showing the large loom and explaining/demonstrating how it’s done, defining terms warp and weft, etc. Teacher then asks a few students to come and demonstrate, assessing for understanding.
17. After this experience, teacher presents idea of making our own weavings on cardboard looms. Teacher distributes looms, recalling warp and weft.
18. Teacher explains/demonstrates: area of loom to work in and where to start (at least 2 1/2 inches from top so threads can be tied off later); use of yarn, needle, pic/comb to beat back rows and keep straight; how much yarn to cut to begin with; how to begin a new color; how to weave weft on a diagonal (then use pic/comb) to keep from pulling in sides of weaving too tight and distorting shape.
19. Teacher recalls the use of symbolism in the Kente cloth weavings, and suggests students do the same, asking them to think of something they would like to symbolize about themselves, and then choose from our yarn colors accordingly to use in their weavings. For example, think of a quality you have, or would like to have more of in yourself, like strength, or speed or bravery or kindness or friendliness or helpfulness, etc., then choose a color that could represent or symbolize this quality for you, such as red for strength, or green for generosity (colors will have highly personal meanings).
S/Ts help students to come up with ideas using their personal qualities handout lists.
20. S/Ts bring students to table to select their yarn. Students are given looms, pics and needles, then all proceed to weave. S/Ts help students to see where they should begin and end (need at least 2 1/2 inches of warp thread showing at both top and bottom to tie off piece when finished, so do not start or end close to the top or bottom of the loom; can mark with piece of masking tape for a visual guide). Students are encouraged to work in silence, and get into the rhythm of the weaving.
NOTE: IF QUIET ENOUGH, PLAY AFRICAN MUSIC WHILE WEAVING
21. Weaving will carry over into our second day of this lesson, when students complete their weavings, and S/Ts will help them tie off/knot ends, making a fringe on bottom by tying every two threads together. Top is tied off in the same manner.
NOTE: Teacher will start the second day’s experiences with a brief recall of the culture under study, and a continuation of the next segment of slides in our overview of African culture.
22. Finished weavings are labeled with masking tape, and taped up on board for display and discussion.
Closing:
23. Teacher has children recall major terms/concepts: culture, textile, types of African textile designs, weaving terms, warp and weft.
24. Students share their weavings, explaining any symbolism they may have used.
25. Teacher explains that we will use our weavings in another special project as we continue our exploration of African culture.
OPTIONAL: The weavings can be embellished by sewing on buttons or bits of bone, or pinning on seed beads.
Assessment:
In addition to observation of the Performance Objectives described above for evaluating students, as well as noting what teachers may need to re-teach or do differently, questions to ask might include:
- Were students able to weave with a minimum of mistakes in applying their weft threads?
- Are weavings fairly uniform, with minimal bowing in center? Were students able to control their tools and materials?
- To what degree did students
incorporate use off symbolism in their color choices?
Abbreviation Key
DBAE: |
NYS Standards for the Arts: |
|---|---|
| AH = Art History | Std. 1 = creating, participating in art |
| AC = Art Criticism | Std. 2 = knowing art materials and processes |
| AE = Aesthetics | Std. 3 = responding to works of art/artists |
| AP = Art Production | Std. 4 = knowing cultural dimensions of art |
| Needs Assessment Areas for Developing Skills and Abilities: |
||
|---|---|---|
| A/C = academic/cognitive | M/P = motor/perceptual | E = emotional |
| C = communicative status | W/S = work/study habits | S = social |
| Pre-V = prevocational skills | L = living skills |
|
This is a non-commercial website and is to be used for educational or research purposes only. No commercial use is permitted without the consent of Art Partners. "Fair use" is claimed under U.S. copyright law, sections 107 and 108. For questions contact:Art Partners
©2002 Art Partners Program | All Rights Reserved